
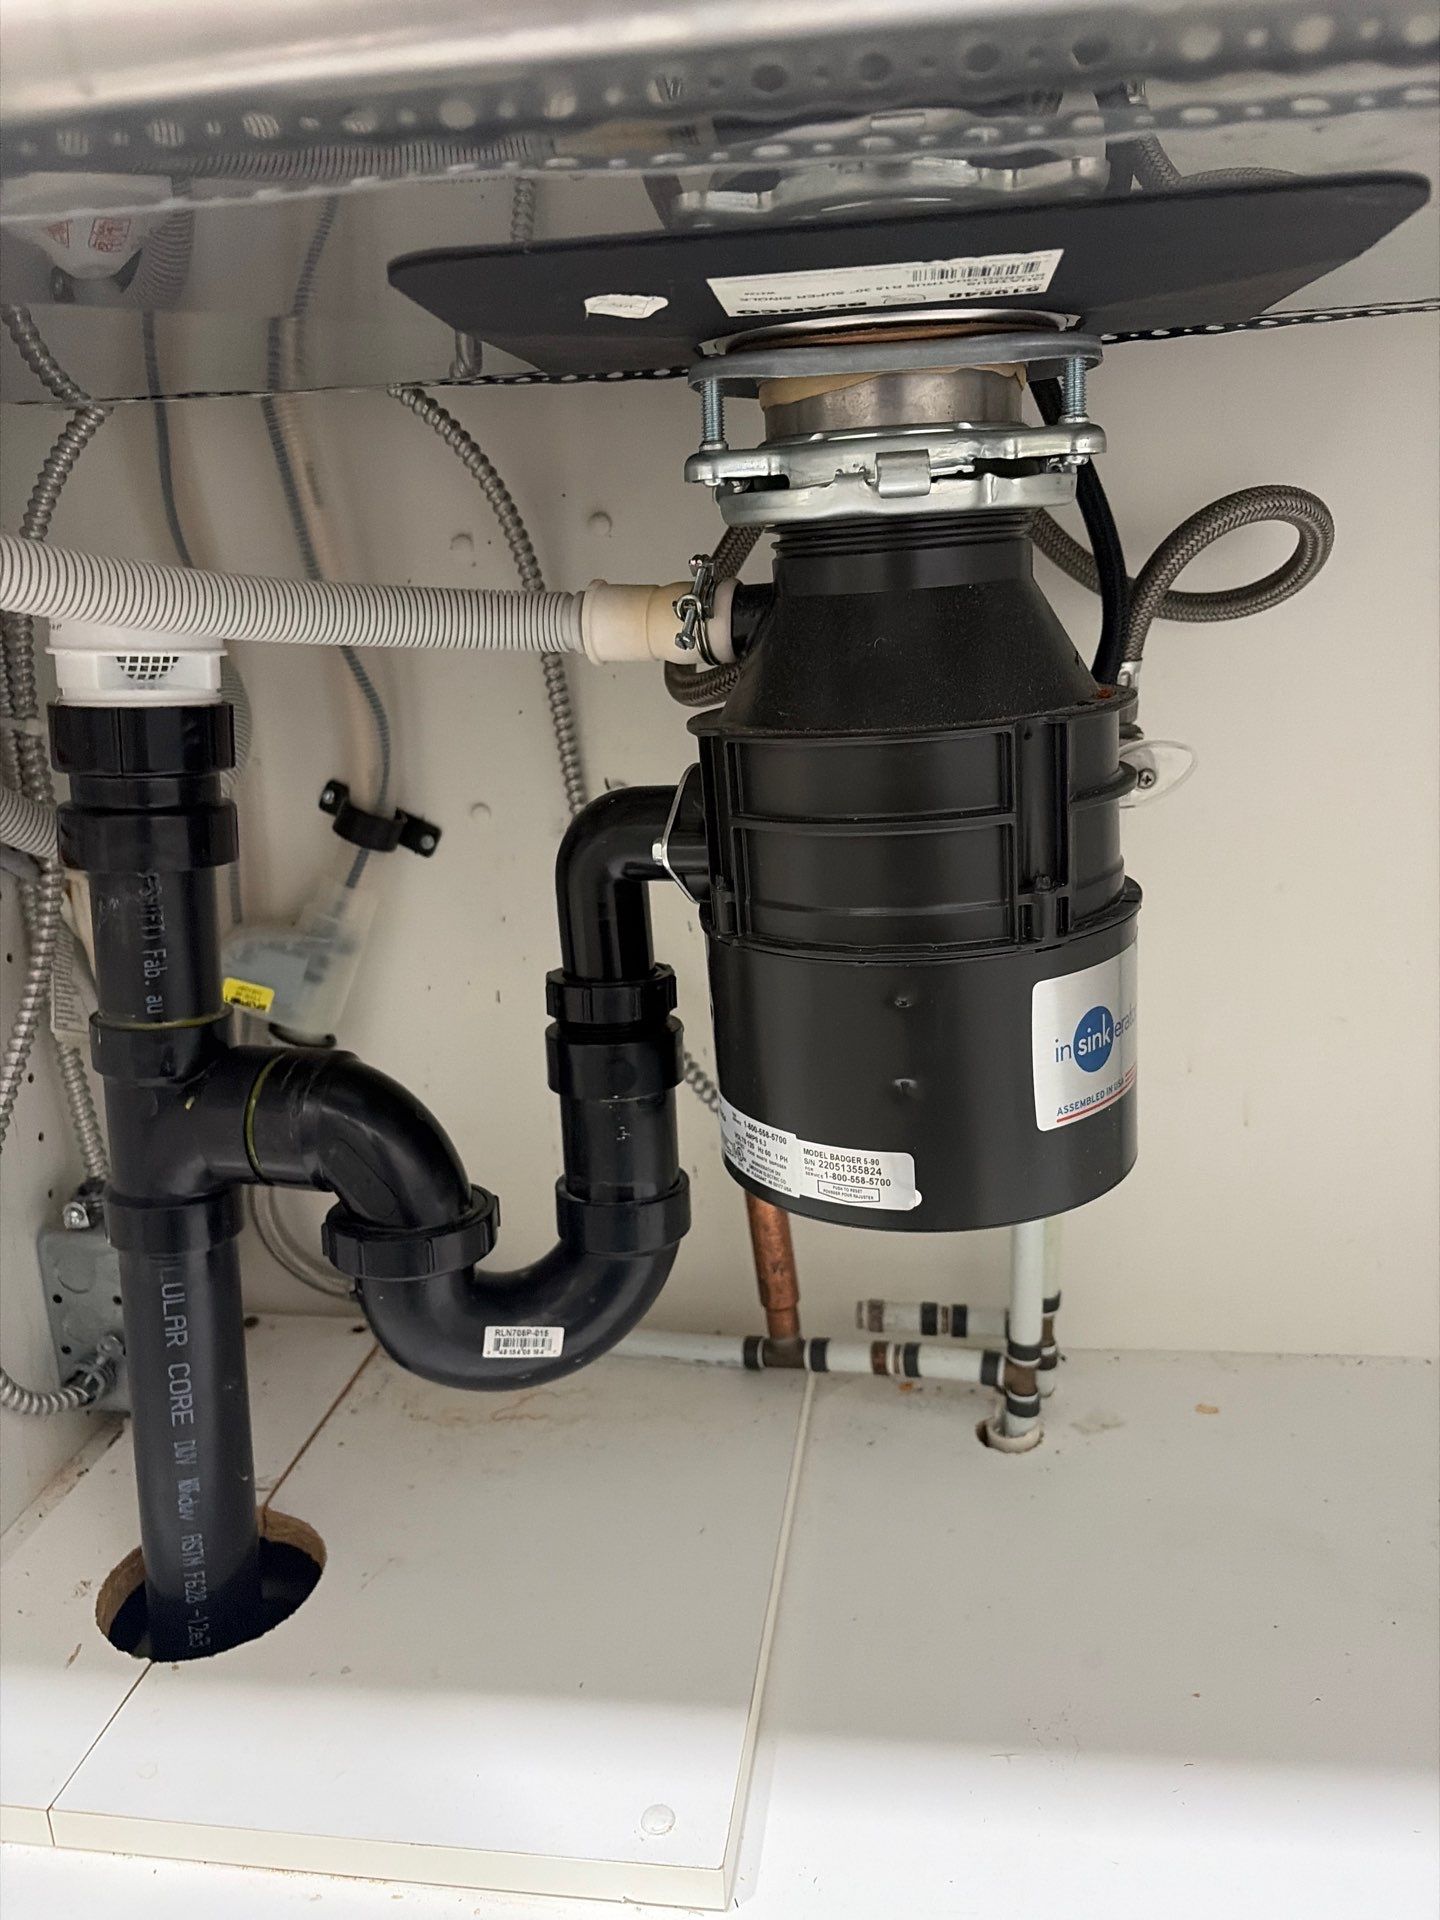
Garbage Disposal Installation
Services offered in: Tri-Cities, Vancouver Core, The North Shore, and The Fraser Valley
Around here it answers to two names, garbage disposal or garburator, and it does one job: grind food scraps fine enough to leave through the drain instead of the garbage bin.
What We Do
- We size the unit to your household and your cabinet.
- We mount it fresh.
- We rebuild the drain to fit the new unit.
- We do the dishwasher connection correctly.

Same-Day Service
Free Quotes
Free Estimates
Crazy Fast Plumbers
About this service
Garbage Disposal Installation
Around here it answers to two names, garbage disposal or garburator, and it does one job: grind food scraps fine enough to leave through the drain instead of the garbage bin. Installation is the service for putting one in, whether that’s a first-ever unit under a sink that’s never had one, a replacement for a disposal that has ground its last, or an upgrade from the builder-grade unit that jams on anything firmer than soup. It’s a compact job in a compact space, and it’s one of the most satisfying half-days we get to do, because the payoff starts with the first meal cleaned up afterward.
Compact doesn’t mean casual. A disposal hangs its whole weight, plus vibration, plus a motor, off the bottom of your sink, splices itself into the drain, often hosts the dishwasher’s discharge, and plugs into electricity, all inside a cabinet where every one of those systems is centimetres from the others. A good installation makes them cooperate for a decade. A sloppy one leaks at the sink flange, drains uphill, backfeeds dirty water into the dishwasher, or hums against a jam on day one. The difference is entirely in the details of one afternoon, which is what this page walks through.

What a Disposal Installation Actually Involves
Every installation, first-time or replacement, is the same five systems meeting under one sink.
The mounting is everything. The disposal hangs from a mounting assembly seated at the sink’s drain opening, sealed with fresh plumber’s putty or sealant and clamped from below. This joint carries the unit’s full weight through years of vibration, and it’s the number-one leak point in amateur installs, usually because old putty was reused or the ring wasn’t tightened evenly. We set it fresh, torque it evenly, and load-test it, every time.
The drain has to fall, not wander. The disposal’s outlet connects through a discharge tube to the trap, and that path needs continuous fall and clean alignment. Replacement installs inherit whatever geometry the last unit used, and unit heights differ between brands and models, so the discharge and trap often need rebuilding rather than reusing. First-time installs need the drain reconfigured to route through the unit. Either way, the finished assembly should be rigid, sloped, and serviceable.
The dishwasher usually joins in. Most dishwashers discharge into the disposal through a dedicated inlet on the unit’s side. Two details are non-negotiable: the factory knockout plug inside that inlet must be removed on a new unit, the single most famous forgotten step in the trade, it turns the first dishwasher cycle into a flooded machine, and the dishwasher hose must rise in a high loop above the drain level so waste water can’t siphon backward into the clean machine. Our appliance drain connection service covers that geometry in depth.
Electricity is the fourth system. Disposals run on a switched circuit, either hardwired or plugged into an under-sink outlet controlled by a wall switch or an air switch on the counter. If the sink has never had a disposal, that circuit may not exist, and creating it is licensed electrician work we coordinate. Replacements usually reuse the existing supply.
Sizing is the quiet decision. Motor size, grind stages, and noise insulation vary widely. A small household with light use lives happily with a mid-range unit; a big cooking household earns the stronger, quieter models. Bigger units are also physically larger, and cabinet space under modern deep sinks is finite, so fit gets checked before purchase. Dwelling form, construction era, and renovation history also shape the installation. A condo or strata kitchen may already have the sink opening, drain geometry, and switched power for a straightforward replacement, while a first-time installation in an older detached home may need drain and electrical changes before a unit can be added properly.
What Happens If the Installation Is Done Wrong
Disposal installation mistakes are famous enough to have nicknames. The forgotten knockout floods the first dishwasher cycle into a machine that can’t drain, and the service call to fix it costs more than the installation would have. The reused-putty flange weeps a grey drop of food-laden water into the cabinet with every grind, feeding odour and rot in the least-inspected corner of the kitchen. The uphill discharge tube, forced to fit between a tall new unit and an old trap, holds ground food slurry in a sagging low spot that clogs monthly and smells always. The missing high loop lets grey water siphon into the dishwasher, which announces itself as a machine that smells swampy no matter what you clean. And the unsupported electrical connection, wire nuts dangling in the splash zone, is exactly as bad an idea as it sounds. None of these require bad luck, only haste, and all of them are permanently prevented by an installation done in the right order with fresh parts.
What to Feed It, What to Spare It
A disposal’s lifespan is mostly diet. It thrives on soft scraps, plate scrapings, and small stuff arriving with plenty of cold running water, before, during, and for ten seconds after the grind. It suffers on the classics: fibrous husks and peels that wrap the impellers, starches in bulk that paste into the trap, grease that ghosts through as liquid and sets as a clog downstream, and anything that was never food. Coffee grounds split opinion; in modest amounts with generous water they pass fine, by the cupful they sediment. Ice cubes now and then knock the grind chamber clean, and a citrus peel does more for the smell than anything sold in a bottle. A disposal works alongside an organics or green-bin program, not instead of it. Use it for plate scrapings, pot rinsings, and daily small waste, while bones, bulk food, and fibrous material stay in the bin. Feed it like this and the unit on this page meets our repair service rarely, and late.
Kitchen plumbing problem right now? Call The Crazy Plumber at (236) 552-0190, or Schedule Your Plumber. Same-day help is available, with fast help for leaks that cannot wait. Plumber Now, Pay Later is available on every service we offer.
Service details
- Tri-Cities
- Vancouver Core
- North Shore
- Fraser Valley
Spot the signs
Signs You’re Ready for a Disposal Installation
- There’s no disposal and you’re tired of the compost bin’s timeline. Scraps in the bin wait for pickup; scraps down the disposal are gone now.
- The existing unit is dead or dying. Permanent hums, breaker trips, or a body weeping rusty water from underneath all mean replacement, not repair; our garbage disposal repair page draws that line precisely.
- The existing unit leaks from the housing. A cracked or rusted-through body is unrepairable, and it drips dirty water into the cabinet with every use.
- You’re replacing the sink anyway. A sink swap is the cheapest moment ever to add or upgrade a disposal, since the drain is already apart.
- The current unit jams on everything. Builder-grade quarter-horsepower units struggle with real cooking; upgrading to a stronger grind ends the weekly reset-button ritual.
- The noise is a household issue. Modern insulated units run dramatically quieter than the old uninsulated growlers, a real upgrade in open-plan kitchens.
- A dishwasher is being added. The disposal’s dishwasher inlet is the cleanest discharge point for a new machine, and installing both together sequences perfectly.
Job steps
What The Crazy Plumber Does
- We size the unit to your household and your cabinet. Cooking volume, sink depth, cabinet clutter, noise sensitivity, and dishwasher plans all feed the recommendation; supply your own unit or have us bring a professional-grade one.
- We mount it fresh. New sealant at the sink flange, mounting ring torqued evenly, and the unit’s weight verified on the assembly, because this joint has one chance to be right.
- We rebuild the drain to fit the new unit. Discharge tube and trap aligned with continuous fall, rigid and serviceable, never forced to meet geometry left over from a different machine.
- We do the dishwasher connection correctly. Knockout removed and retrieved, hose in a secured high loop, clamp tight, and a full dishwasher drain cycle run as part of testing.
- We handle power properly. Existing switched circuits reused and verified; new circuits coordinated with a licensed electrician, with air-switch options offered where wall switches don’t exist.
- We test with real use. Water running, unit grinding, dishwasher discharging, every joint towel-checked dry, and a quick owner’s briefing: what it grinds happily, what it hates, and where the reset button and hex key live.
Before you book
Questions homeowners ask
Nearly any standard sink with a 3.5-inch drain opening, which is almost all of them. The real constraints are below: enough cabinet depth for the unit under today’s deep bowls, a drain that can be routed with fall, and power. Very thin stainless sinks can transmit more vibration and noise; a mounting done properly with a well-insulated unit manages it.
Only if the switched circuit doesn’t exist yet. Replacements almost always reuse the existing outlet or hardwire connection. First-time installs in older homes often need the circuit created, which is licensed electrician work; we coordinate it so both trades land in one plan, and we can offer a counter-mounted air switch where adding a wall switch would mean opening tile.
Continuous feed, the common type, runs while the switch is on and takes scraps as you work; it’s what most households want. Batch feed only runs with a magnetic stopper in place, trading convenience for an extra layer of safety, a fair choice for households that want the interlock. We install both.
For many households, a three-quarter horsepower unit from a major brand is the sweet spot: strong enough for real cooking, insulated enough for open kitchens, and compact enough for deep-sink cabinets. Light users can go half horsepower; serious cooking households earn the one-horsepower class. We will size it based on your cooking habits, sink depth, cabinet space, and noise priorities.
Karn did an excellent job fixing a messed up shower tap/diverter thing. He is polite, knowledgable and very tidy. Even cleaned the hair clumps out of the drain (not my hair). Did a great job, thank you.
Ryan came to fix my clogged shower drain and he did the job within an hour! Quick and efficient! Thank you!!
I had an excellent experience with Crazy Plumber! They were professional, punctual, and completed the job quickly with great attention to detail. Communication was clear from start to finish, and they left everything clean after the work was done. The quality of the installation exceeded my expectations, and their pricing was fair. I highly recommend Crazy Plumber to anyone looking for reliable and trustworthy plumbing services. Thank you for the outstanding work!
Brad was very professional. He explained my options and pricing ahead of time and completed the garbeurator remove and replace in an efficient manner. He was also very friendly. I would contact him again for plumbing needs.
Huge thank you to Crazy plumber for squeezing us in on short notice to fix a leaking hot water pipe under our sink on this busy weekend. They were on time, upfront, and very reasonable about the cost. And had the problem sealed up in one hour. No upselling, no mess left behind. If you need a reliable plumber, call these guys
Book online
Shoot out to karn (hope i write his name correctly), quick and efficient. Took time to explain the issue and show me some tips. Highly recommend crazy plumber, at least Karn ;).